Advanced ServiceNow Configuration - Maintenance Mode
Automatically Scheduling a Maintenance Mode from a Change Request
With the introduction of the Inbound Maintenance feature comes the opportunity to fully automate certain aspects of the maintenance mode workflow. Change requests are a good example of a workflow that can be automated in your ServiceNow environment as they will normally have the requester, the configuration item, a short description, and a schedule that can all be used to build up a maintenance schedule. By default, the ‘Cookdown Maintenance Mode Add-on’ does not ship with any logic to automatically create Maintenance mode entries from Change Requests as each organization will have its own checks, balances, and processes around change control that we would not wish to interrupt. However, you can find a guide below on how you might approach this in practice.
Please only attempt this if you know what you are doing. You may accidentally prevent access to change requests, modify the UI, or interrupt other automation for the whole company, and more. Proceed with caution.
Via Business Rule
Business Rules are server-side scripts that can be executed whenever records/tables are created, modified, etc. They are typically a fast method of introducing automation being very quick and efficient in their execution, but, they are also incredibly flexible utilizing Javascript to implement almost any required behavior you can imagine.
Prerequisites
To begin with, you will need to set up a cross-scope privilege to allow your script to work between the change and maintenance tables.
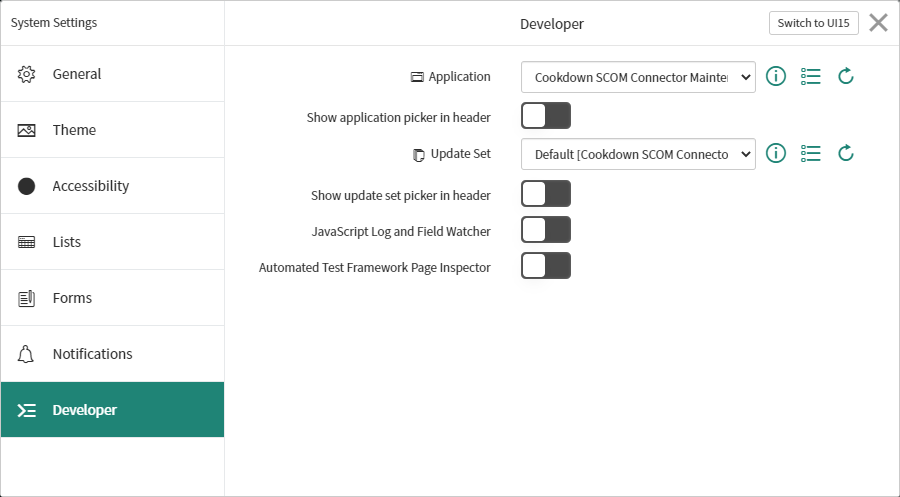
From the 'Settings' cog, select Developer, and then set the application to be Cookdown SCOM Connector Maintenance Mode Add-on'
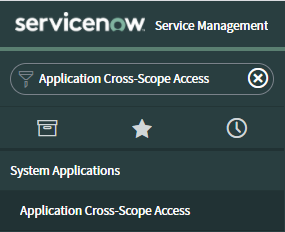
Search for and select 'Application Cross-Scope Access' from the ServiceNow menu
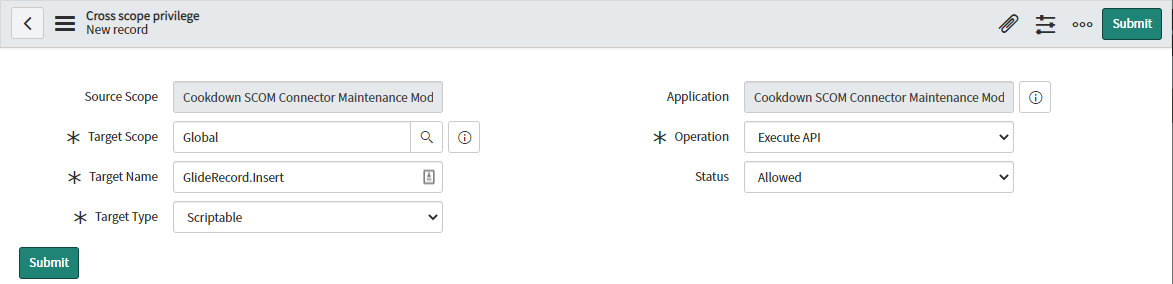
From the Cross scope privileges table select 'New'
Set the Target Scope to 'Global'
Set the Target Name to 'GlideRecord.insert' (note this is case sensitive)
Set the Target Type to 'Scriptable'
Set the Operation to 'Execute API'
Set the Status to 'Allowed'
Verify that all of the settings are correct and then press Submit
Modifying the Change UI
If you wish to make this an optional component or add some checks and balances to the process you may wish to implement a simple control onto the Change UI. This is a very simple example, you can of course marry up any logic to your internal processes.
Select any open change from the change table
From the hamburger menu (☰) select ‘Configure' followed by 'Form Design’
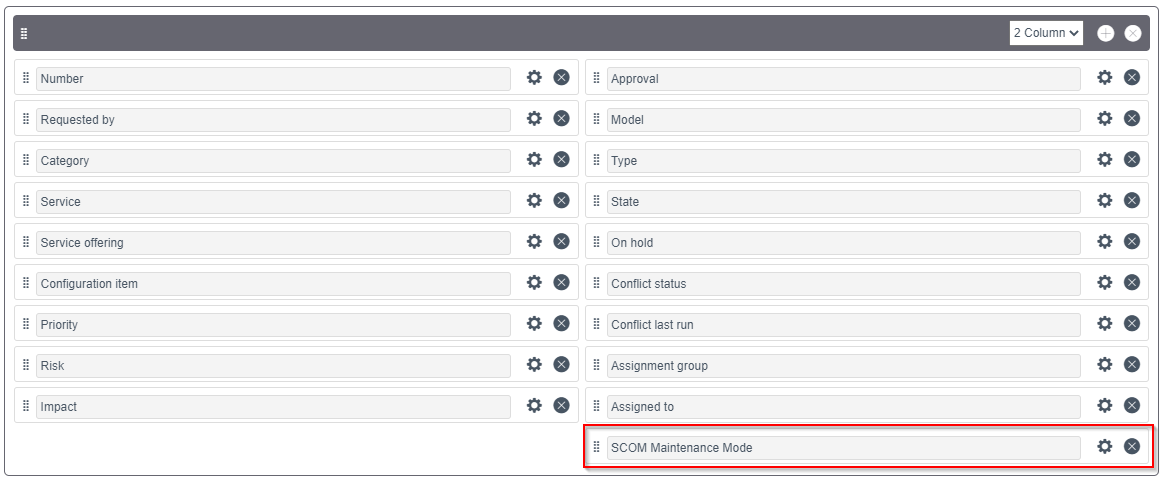
In the first two-column menu add a new ‘True/False' field type by dragging this from the 'Field Types’ menu
Select the 'Edit' cog on the field
Change the Label to ‘SCOM Maintenance Mode’
Change the Name to u_scom_maintenance_mode
When happy save the changes to the form
(Optionally) Define When the Control Is Shown
You may have scenarios where you do or do not want this UI control shown. In this case, you would likely want to implement a ‘UI Policy' or a ‘Client Script’ to show the control when appropriate. A 'UI Policy’ is the easier of the two to implement, however, this does provide fewer customization options.
From the Servicenow menu search for 'UI Policies'
From the ‘UI Policies’ table select 'New'
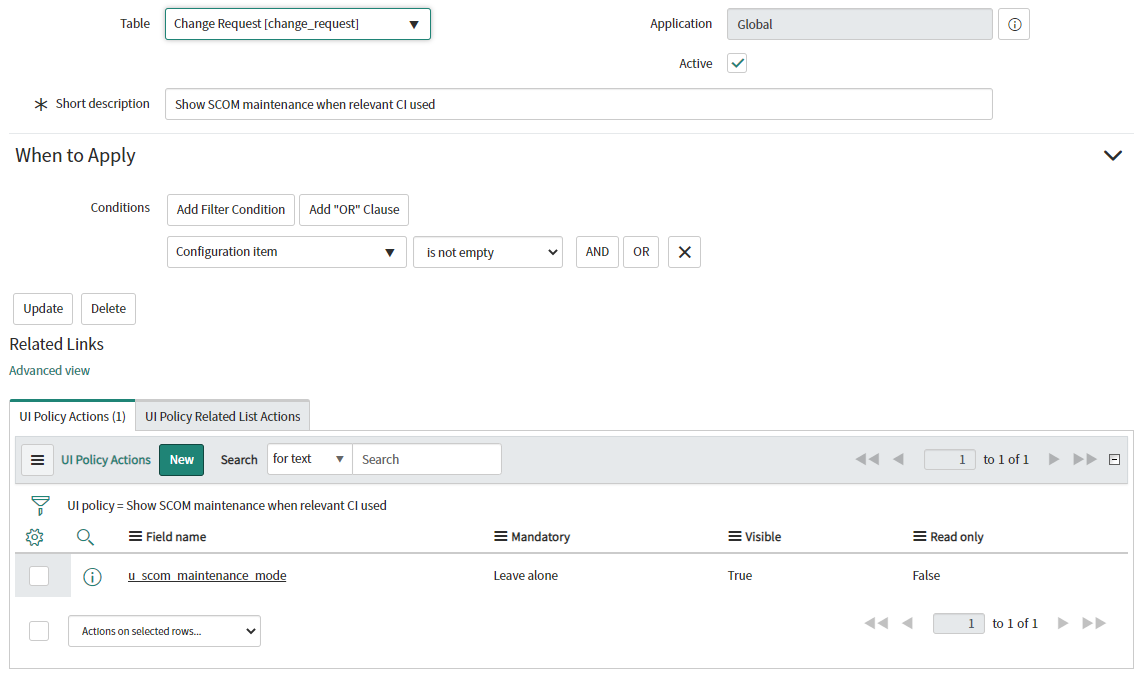
Set the Table to 'Change Request'
Set the Short Description to something appropriate like 'Show SCOM Maintenance mode on CI'
Set the Order as appropriate (the default is 100)
From ‘When to Apply' select 'Add Filter Condition’
Set the filter to [Configuration Item][is not empty]
When you are happy submit the UI policy
Re-open the UI policy you have just created
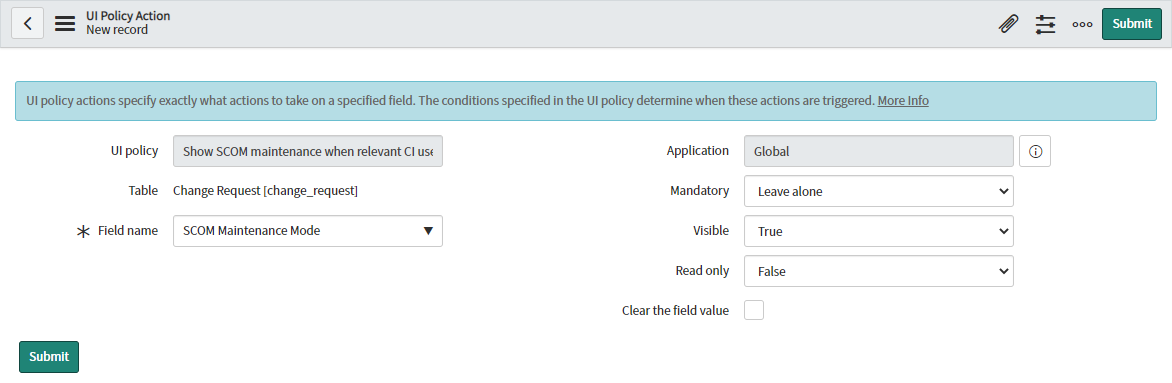
Under ‘UI Policy Actions' select 'New’
Set the ‘Field name’ to 'SCOM Maintenance Mode' (or whatever you labeled it)
Set 'Visible' to True
Set 'Read only' to False
When you are happy, submit the form
Showing a client script is outside the scope of this article as the logic and configuration would be specific to individual organizations. However, you might want to consider showing the field only when a valid configuration item is selected. For example ‘Maintenance Mode’ requires the CI to be a server CI with an FQDN present so checking for these conditions would be worthwhile. Similarly, you may wish to only allow this to be applied to certain pre-approved CIs in your organization so you could have your script check if the CI is a member of a certain group before showing the control. You can find ServiceNows documentation on Client Scripts here.
Implementing the Business Rule
Once you have the pre-requisites in place you should be in a position to implement your Business Rule.
Search for and select 'Business Rules' from the ServiceNow menu
From the Business Rules table select 'New'
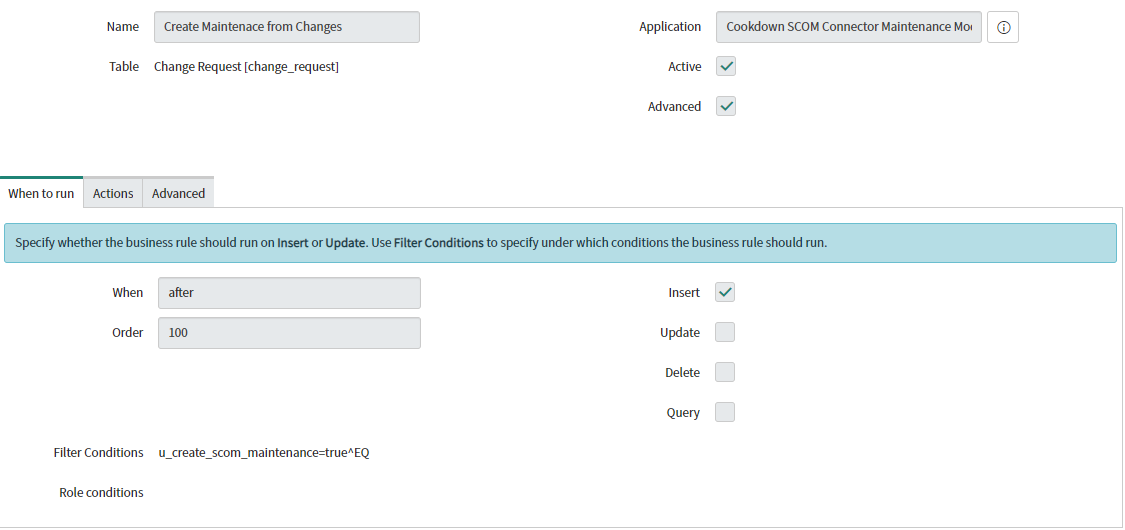
Set the ‘Name’ as appropriate (e.g. 'Create Maintenance from Changes')
Set the ‘Table’ to ‘Change Request’
Select the 'Advanced' option
From 'When to run'
Select 'Insert'
From 'Filter Conditions' set [SCOM Maintenance Mode] [Is] [true]
From 'Advanced' enter your script
See our example below for inspiration
When you are happy with your Business Rule submit the record.
Example Business Rule Script
(function executeRule(current, previous /*null when async*/) {

	var maintRecord = new GlideRecord('x_oklt_cookdown_mm_maintenance_mode_entries');
	maintRecord.initialize();
	maintRecord.comment = "Created from " + current.number + " (" + current.short_description + ")";
	maintRecord.computers = current.cmdb_ci;
	maintRecord.related_task = current.getUniqueValue();
	maintRecord.start_on = current.start_date;
	maintRecord.end_on = current.end_date;
	maintRecord.requested_by = current.requested_by;
	if(current.getValue('type') == "normal")
		{
			maintRecord.planned = true;
		}

	maintRecord.insert();
})(current, previous);