Outbound Notifications for ServiceNow
After using the 'Add New Connection' Outbound Notification action and selecting ServiceNow you will be shown the ServiceNow wizard which will take you through the process of configuring your connection.
ServiceNow Settings
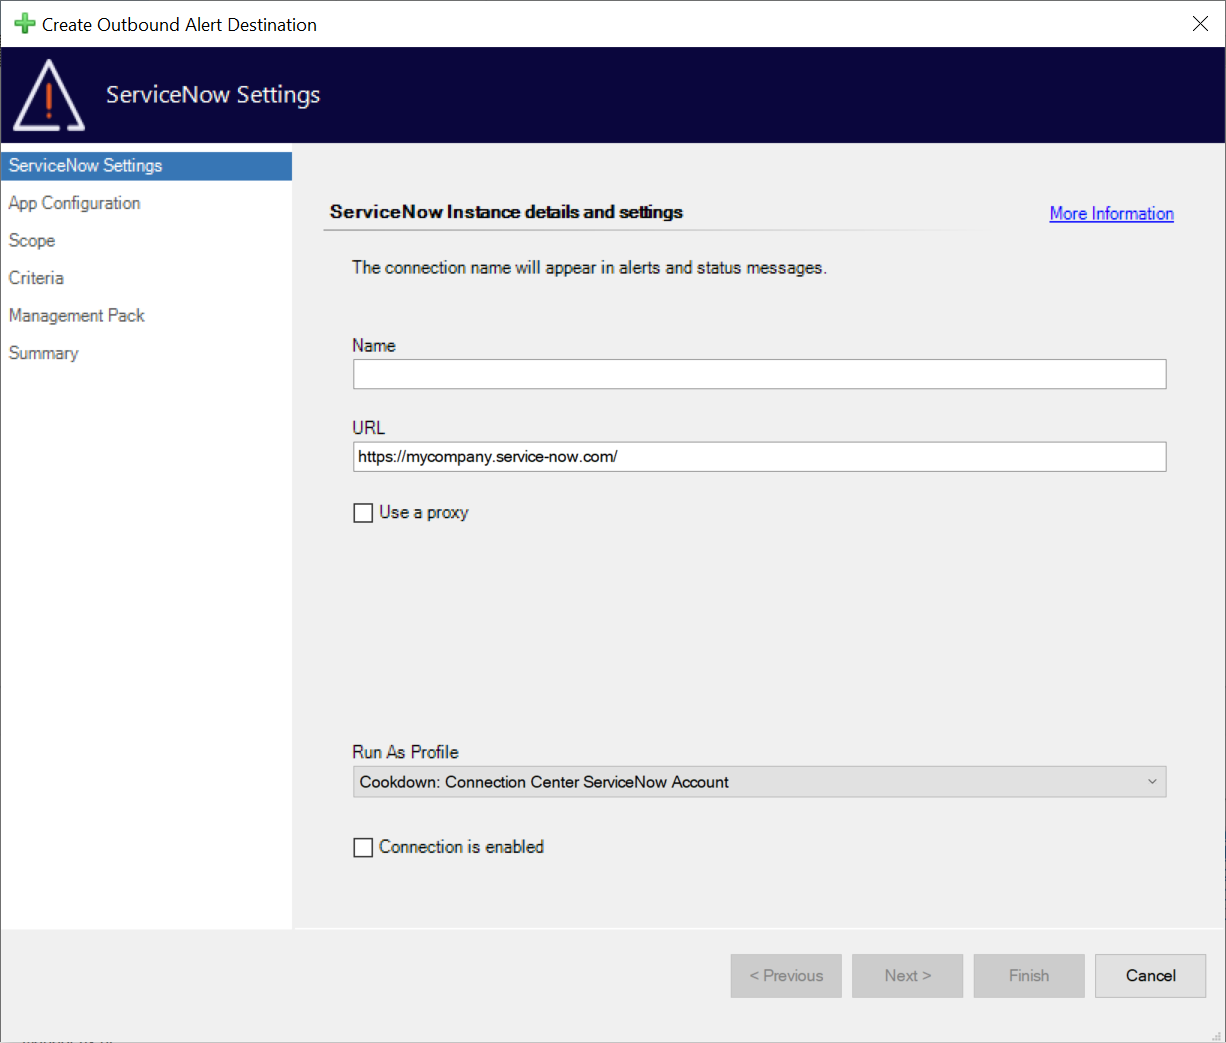
The ServiceNow Settings page defines how you connect to your ServiceNow instance.
Name - A short display name that is used to differentiate connections
We typically advise that you use your instance name with a short description of the alert criteria
URL - The base URL of your ServiceNow instance
This requires the trailing forward slash, for example:
hxxps://<instance>.service-now.com/
Use a Proxy - Whether or not you wish to use a proxy
Defaults to False
Proxy URL - The actual URL used to connect to your proxy
We only support HTTP proxies
If your proxy requires authentication please see here for further details
Run As Profile - The ‘Run As Profile’ that you will use to provide your service account
You can choose to use a different profile if you wish, as long as it is from a sealed Management Pack
Connection is enabled - Whether or not you wish to create the connection in an enabled state
Defaults to False
App Configuration
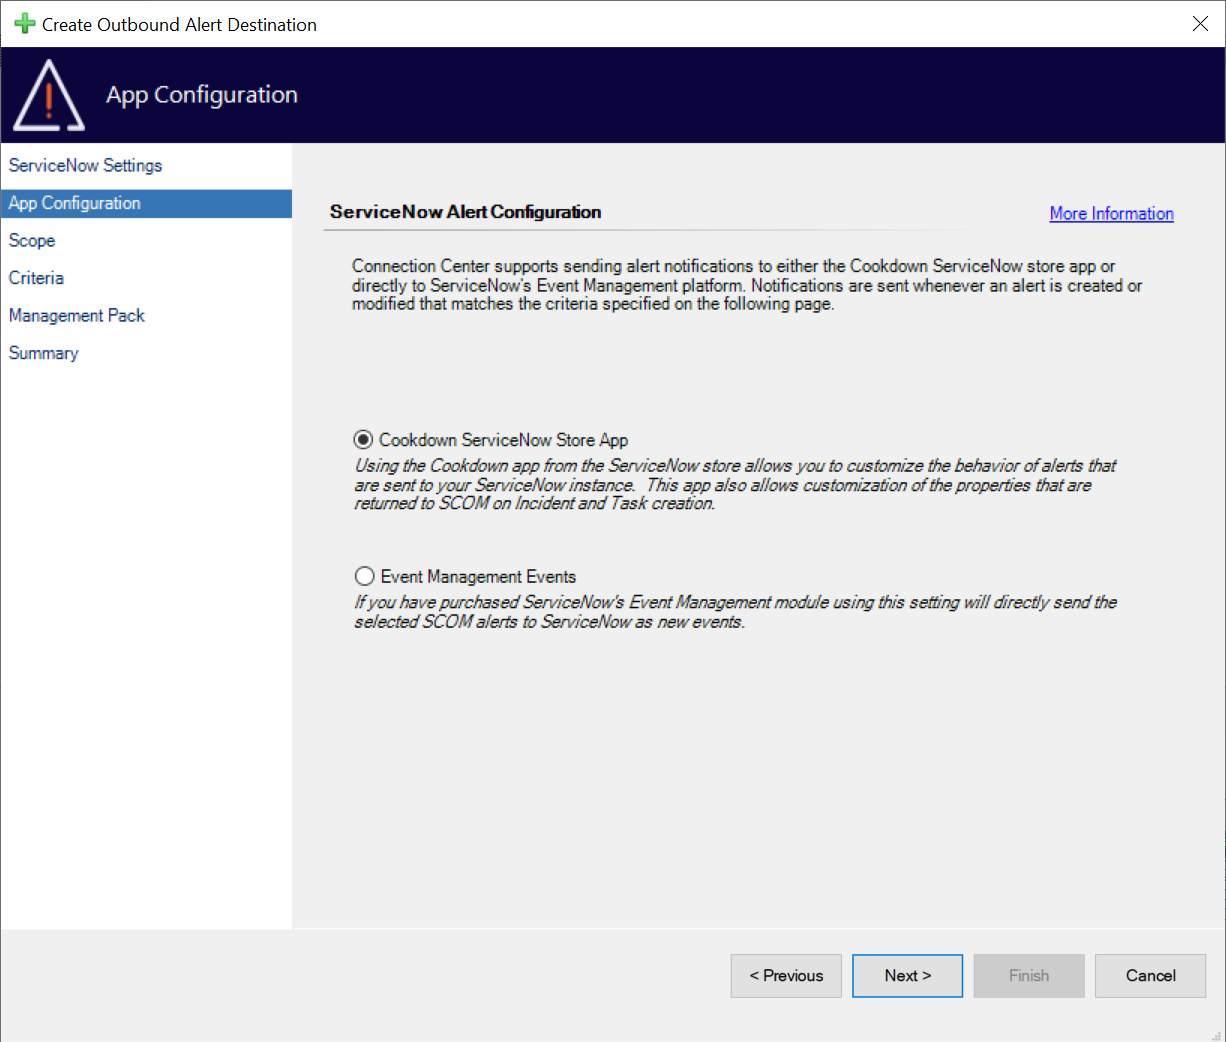
Cookdown provides you with two different methods for posting your alerts to ServiceNow. Via the ‘Cookdown ServiceNow Store App’ or ServiceNow's ‘Event Management’.
You can only choose one per connection, however, they are supported side-by-side so if you wish to use both (say in a transition period) you can set up two separate connections.
Scope (SCOM 2019)
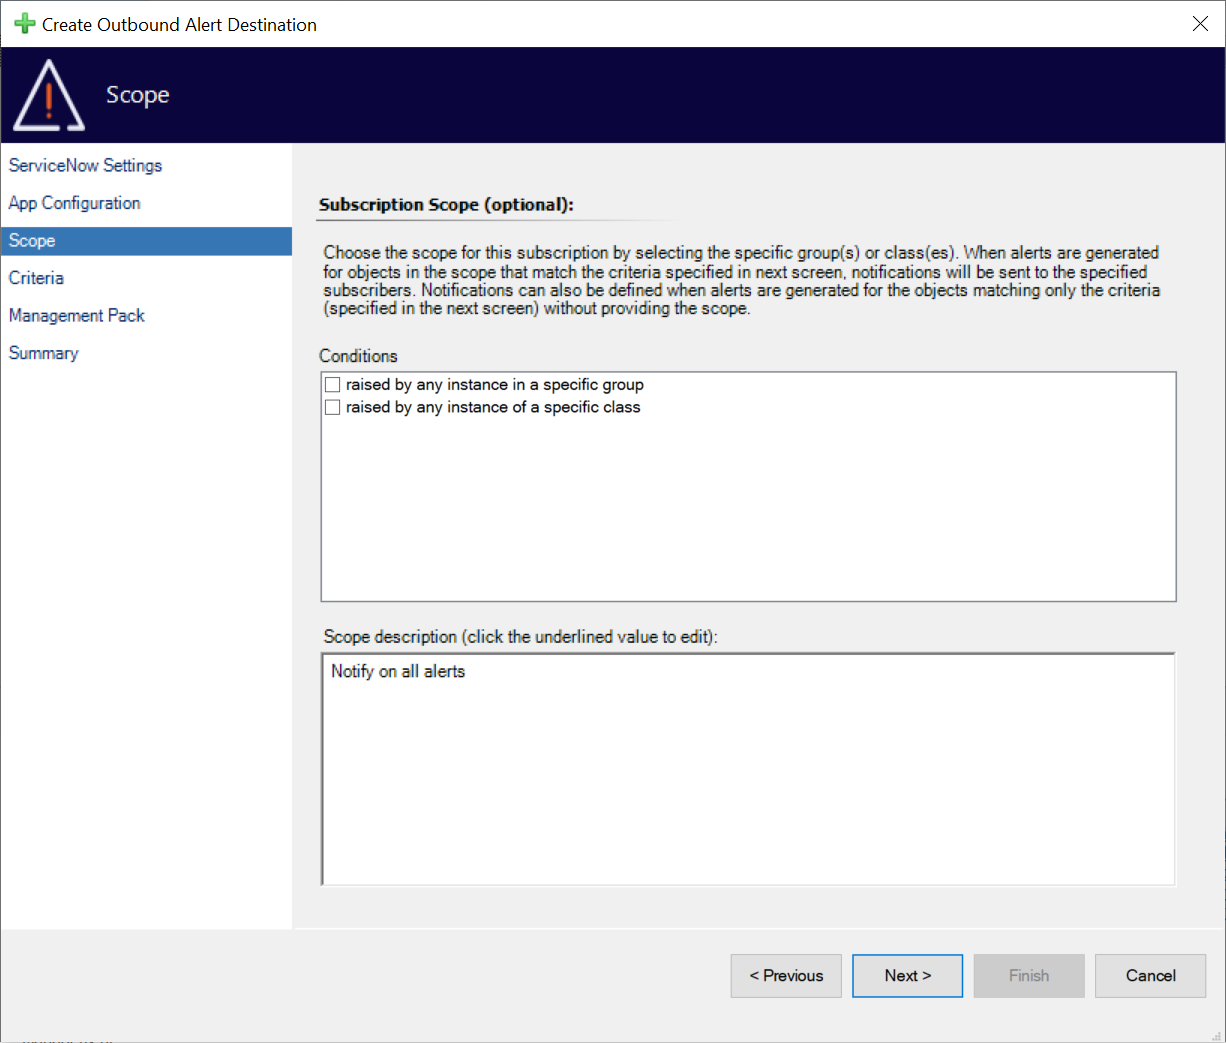
If you are using SCOM 2019 you get the option to set a scope. This allows you to narrow your connections focus down to alerts from certain groups or certain classes. This way you send up only what you need!
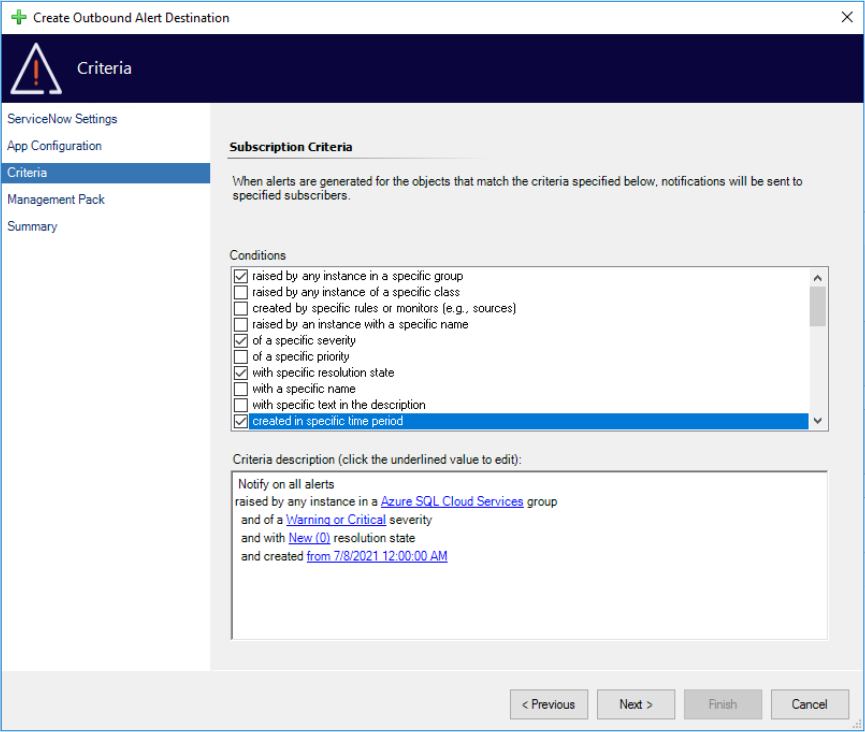
Criteria (SCOM 2019)
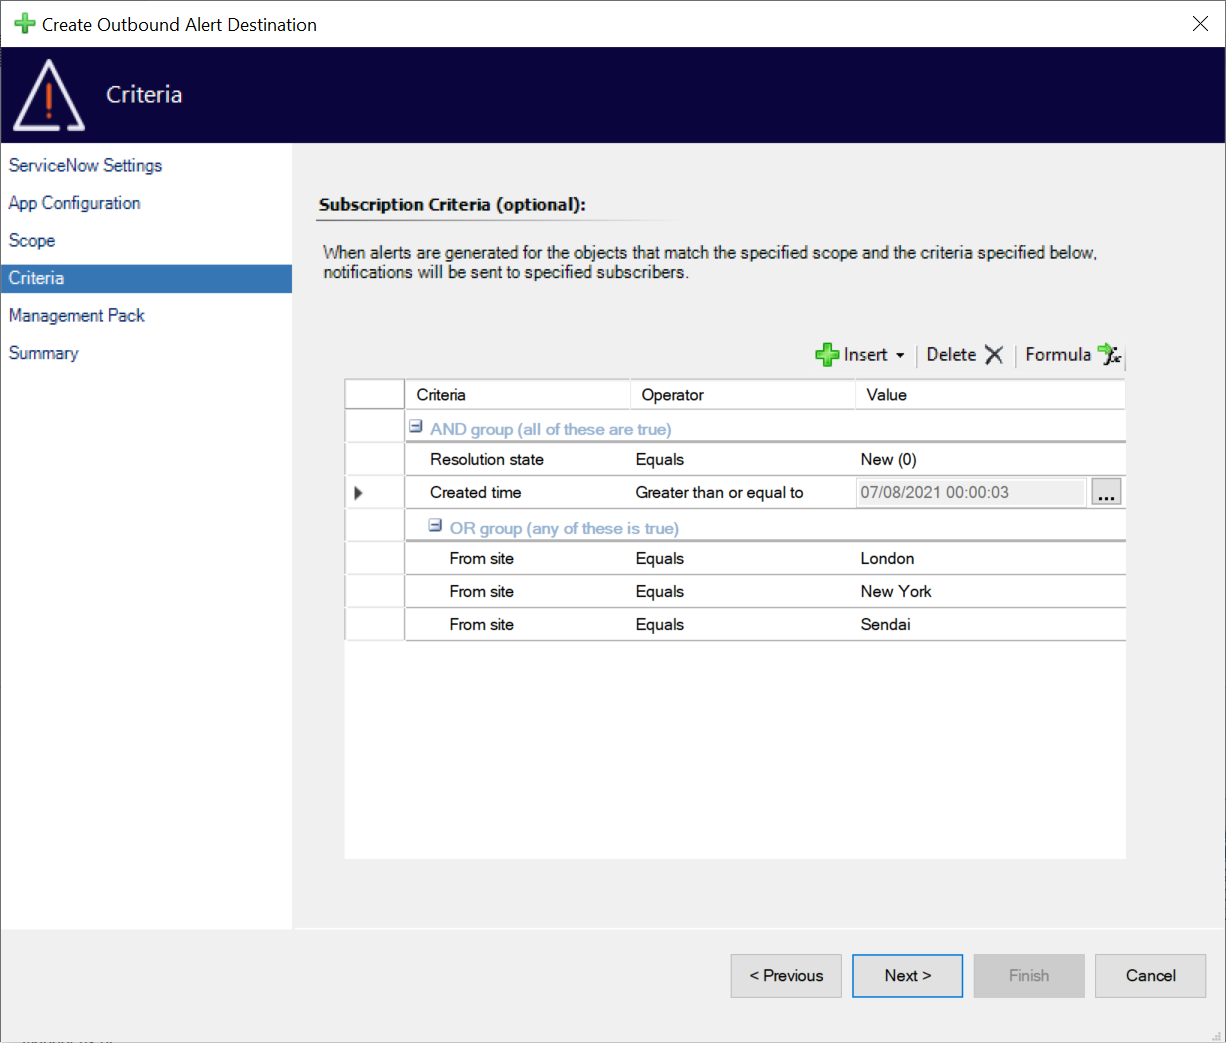
If you are using SCOM 2019 you can set out complex criteria to narrow down the focus of the connection using the interface shown here.
This supports a large number of available alert fields with the Boolean operators AND/OR making for some highly specific criteria.
By default, Connection Center uses subscription-based notifications rather than connector-based notifications. You can read more about this here.
Criteria (Pre - 2019)
SCOM versions pre-2019 have a simpler criteria interface, but this still allows for all the major conditions.
By default, Connection Center uses subscription-based notifications rather than connector-based notifications. You can read more about this here.
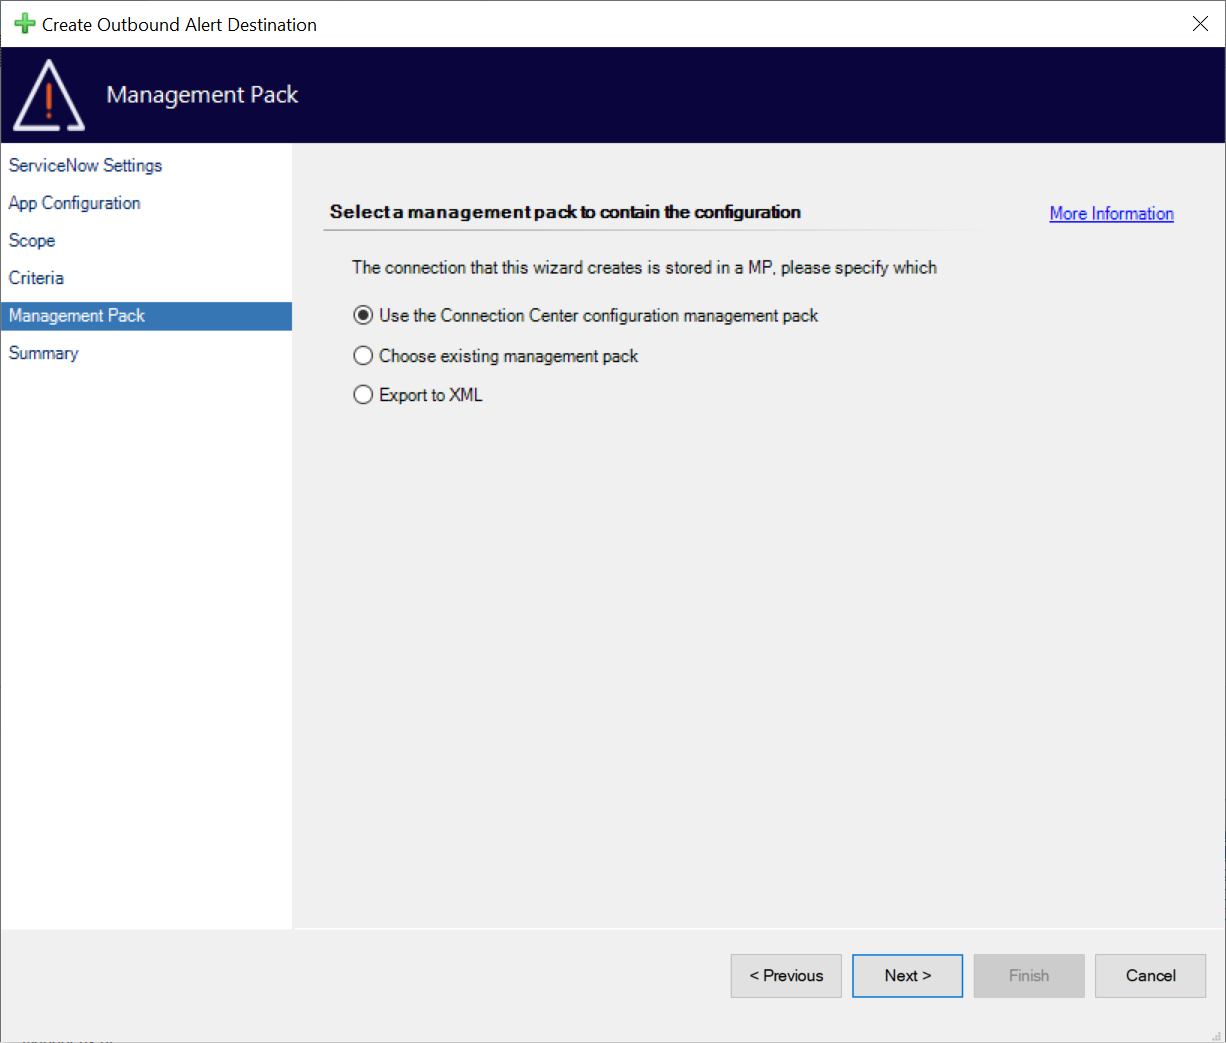
Management Pack
The Management Pack page allows you to select where your configuration will be stored.
By default, we store your configuration in a dedicated management pack. However, you are free to choose your own management pack (including creating a new one). You can also export the configuration to XML for use in change management processes or other reasons.
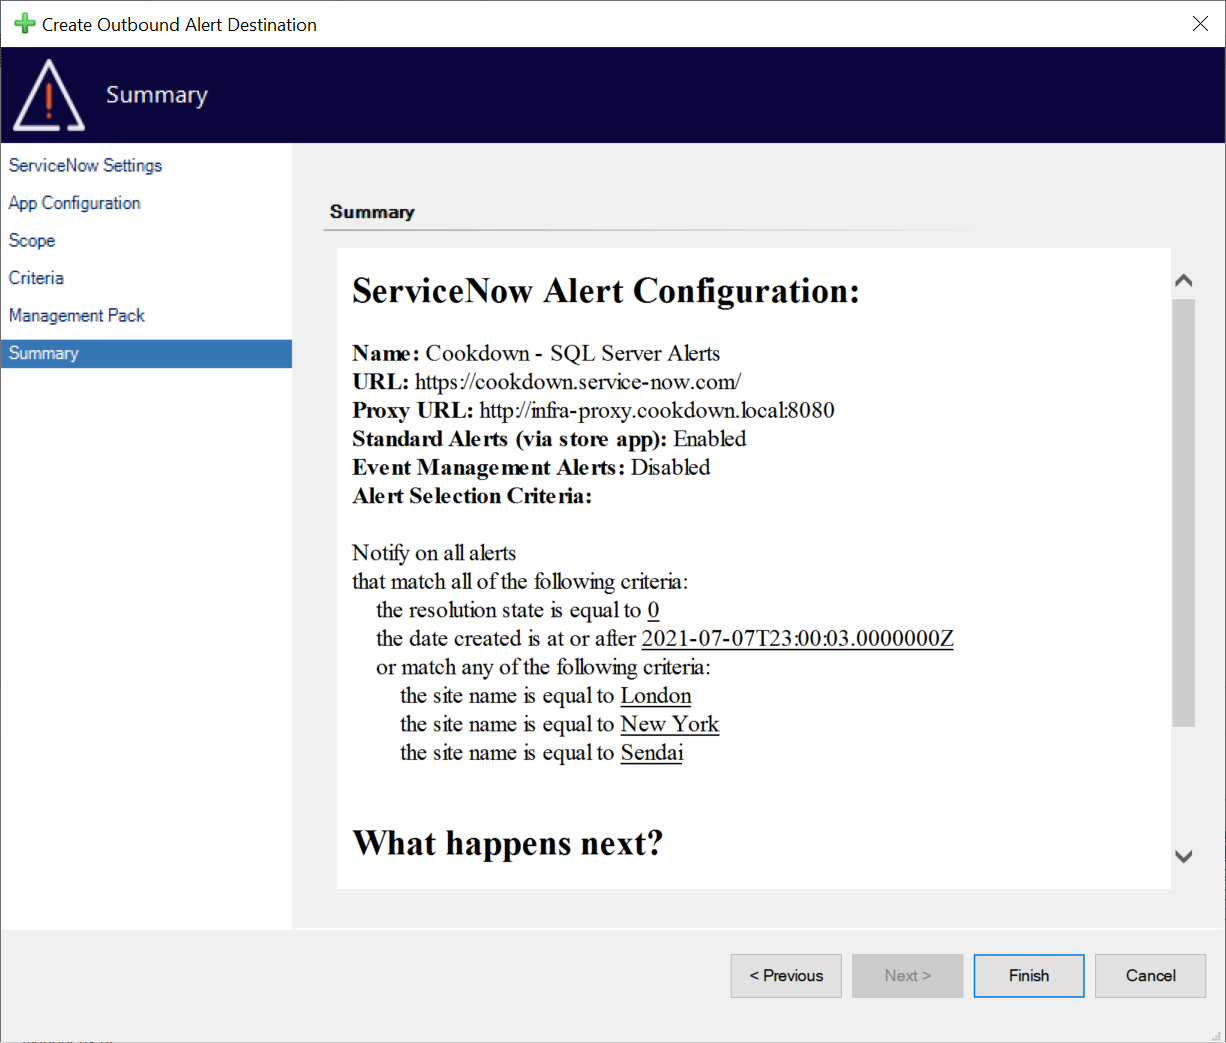
Summary
Finally, you will be brought to the summary screen where you can look over the configuration for a final time before finishing the wizard.
Should you wish to go back and change any part of your configuration, you can use the ‘Previous’ button or jump directly to the relevant page using the links on the left.
After You Finish and Next Steps
When you press the Finish button our wizard sets about putting your configuration in place. If the connection is enabled by default and not exported to XML the connection will set about running a connection test. You can find further details about what to expect from this back on the main page here.
If using the Cookdown ServiceNow app, your next step would normally be to set up some Creation Rules. You could also choose to look at Inbound Notification Connections if you would like to pull back information from ServiceNow to your SCOM alerts.
If you are using scope or criteria it’s important to note that by default each alert needs to match a subscription for each stage of its life-cycle that you care about. For example, if you set a criterion for all alerts to be new, you won’t get any updates when an alert closes. We have further reading about this here.
