Configure Inbound Alert Webhook
If this is the first time creating a new connection after using the 'Add New Connection' Inbound Notification action and selecting Inbound Webhook you may be shown the Global Settings wizard. Once this wizard has been completed you will be taken on to the Inbound Alert Webhook configuration wizard.
Webhook Endpoint
The Webhook Endpoint page defines how you connect to your Inbound Alert Webhook.
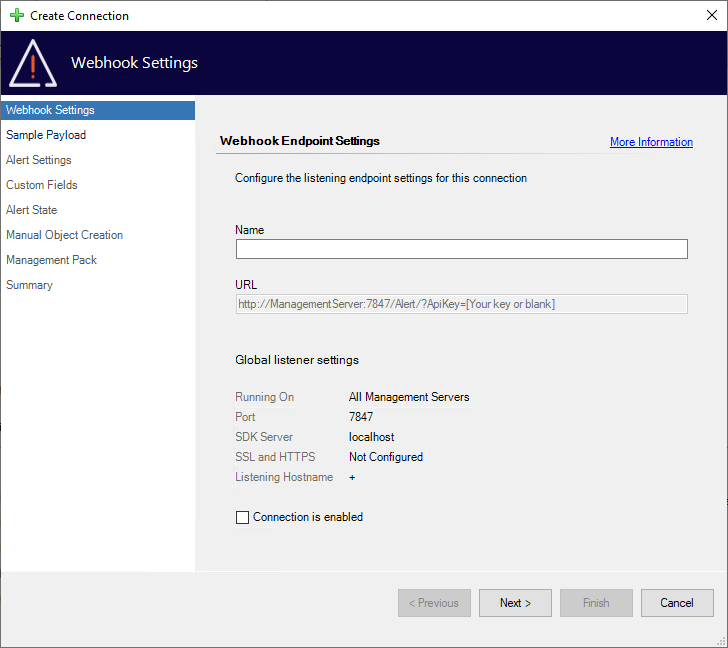
Name - A case-sensitive name that is used in the URL to differentiate connections
As this is used by the URL we do not support the use of special characters or spaces
Between 4 and 55 characters
Must be unique
URL - An approximation of the URL that will be used to connect to your webhook
Built using the provided name
The specifics of the URL used to connect to your webhook will depend on external factors such as DNS records.
The Cookdown Connection Center listener configuration - A reminder of your global settings
Connection is enabled - Whether or not you wish to create the connection in an enabled state
Defaults to False
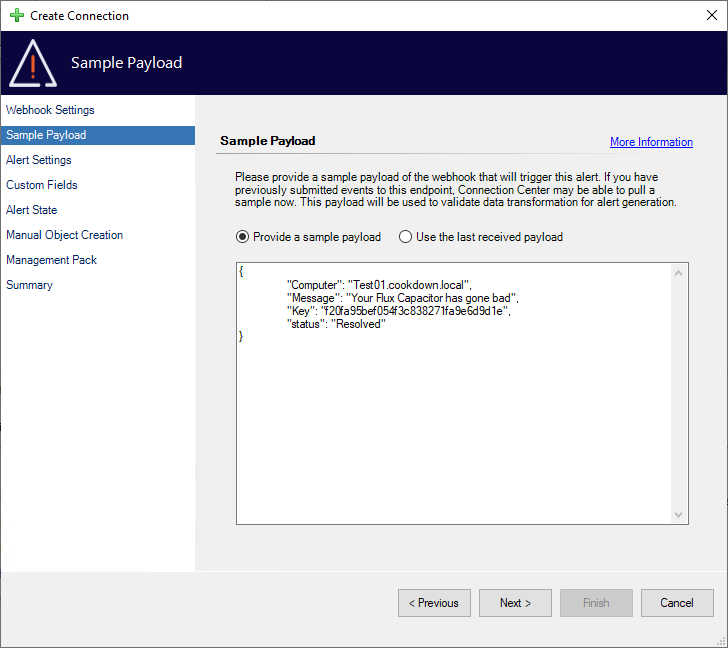
Sample Payload
The sample payload page allows you to set the payload expectations for your webhooks:
If this is a new connection you will usually only have the ability to use the ‘Provide a sample payload' option to manually provide an expected payload. If you are modifying an existing connection, you may be able to 'Use the last received payload’ to use live details.
Lots of providers will give you sample JSON from their webhooks that you can easily copy and paste into the sample payload screen to give you content to work with. If you don’t have that available, you could create the connection using simple values, wait for a connection to be made, and then modify the connection to specification.
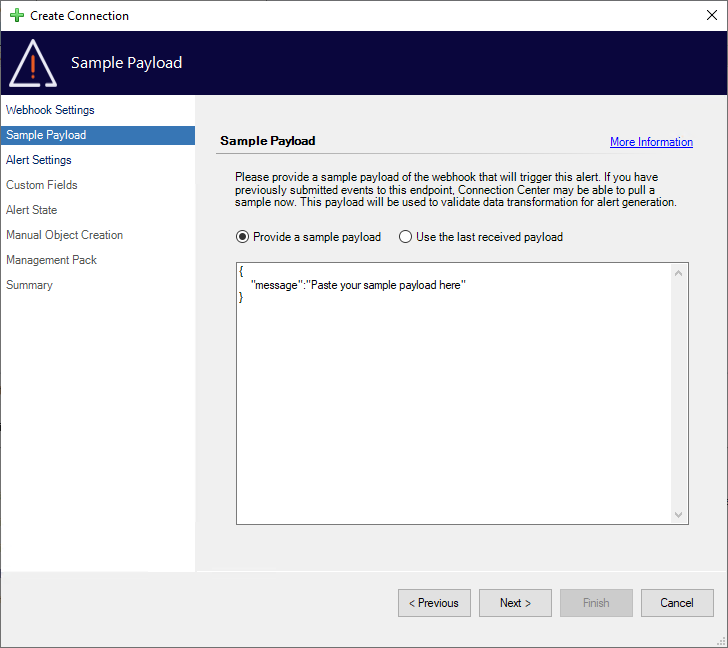
If you are re-using a recently removed connection name, you may see old payloads under 'Use the last received payload' when creating the connection.
Alert Settings
The ‘Alert Settings’ page provides you with the bulk of your alert configuration options.
The ‘Alert Name’, ‘Priority', and 'Severity’ fields are statically customizable to suit your requirements.
The ‘Alert Description Template' is where you can really shine. Using the 'Liquid Template Language’ you can customize this description to make the best use of the data passed in via the webhook, allowing you to generate dynamic and truly useful descriptions from your ingested data on the fly.
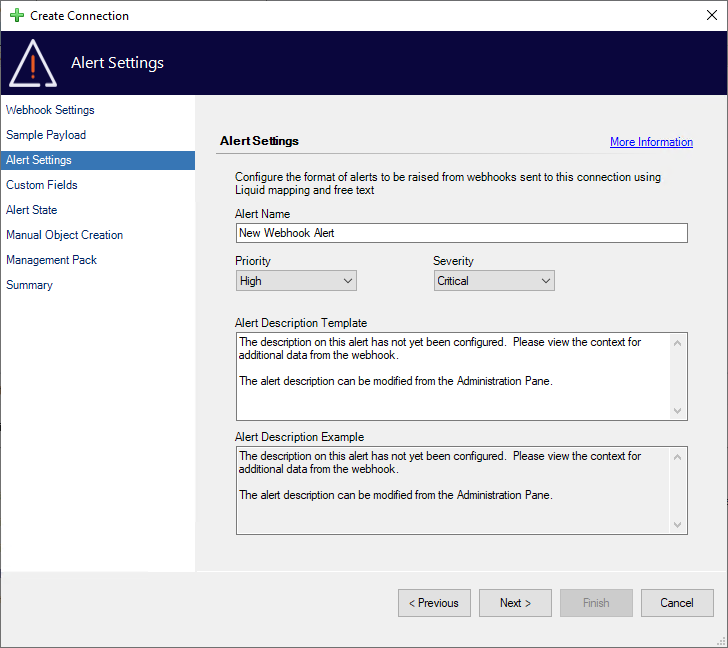
Alert Name
Static text
Priority
High (default), Medium, Low
Can’t be changed once in place, but can be overridden
Severity
Critical (default), Warning, Information
Can’t be changed once in place, but can be overridden
Alert Description Template
Dynamic Text using the 'Liquid Template Language’
Can pull in details from the webhook body as required
Alert Description Example
Shows you the generated Alert Description on the fly
Uses the 'Sample Payload' provided earlier
Custom Fields
Apply data directly to Custom Fields in the alert.
Capped at 255 characters by the underlying database, each custom field is a place where you can store small packets of information.
Backed by the 'Liquid Template Language’ you can cut down large chunks of information to size or generate it on the fly using information from your payload as required.
The field itself is not limited to 255 chars until inserted to the database, allowing for some powerful Liquid Templates.
If the resulting data is longer than 255 chars when generated it will get truncated.
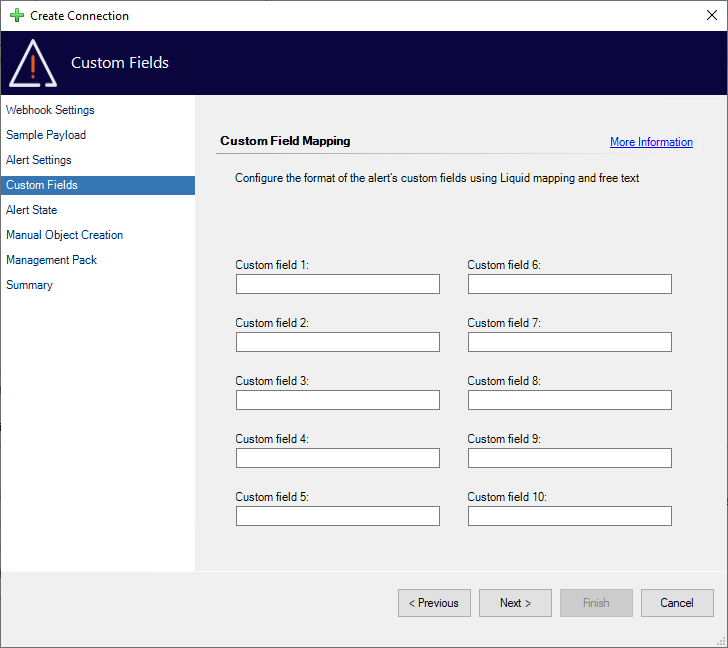
The ServiceNow and Cherwell connections, by default, use Custom Fields 1-5 to store data.
If using one of these connections consider limiting use to fields 6-10.
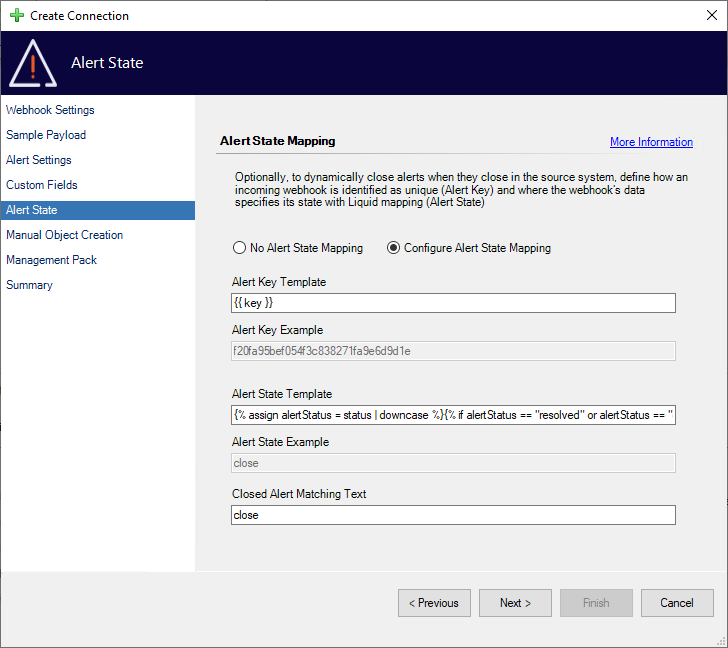
Alert State
Introduced in v. 4.0.0.0
Intended to offer a simpler alternative to Inbound Event Webhooks the alert state feature optionally allows you to dynamically close alerts based on input from remote systems.

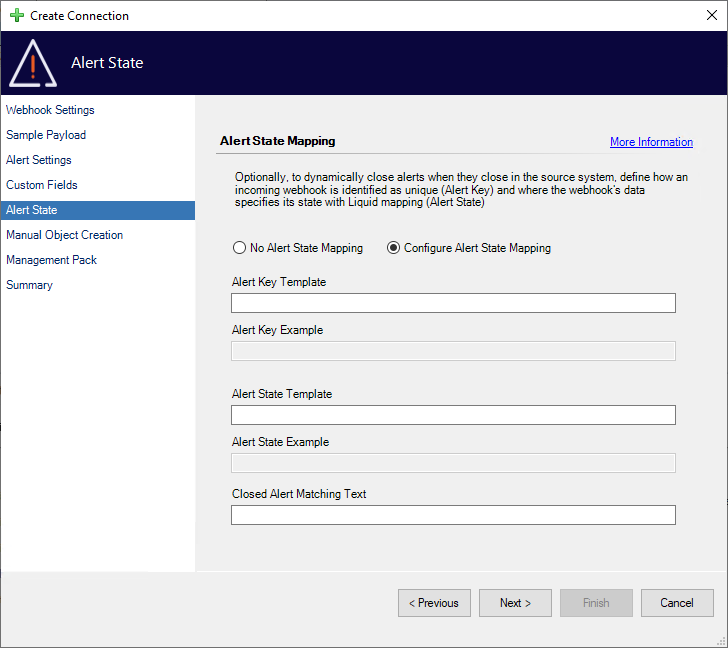
Alert Key Template
Dynamic Text using the 'Liquid Template Language’
Used to create new alerts and match against previous ones
Usually assumed to be an alert Id in the calling system
Alert Key Example
Shows any transformation or output from the Alert Key Template
Alert State Template
Dynamic Text using the 'Liquid Template Language’
Used to determine if the matched alert can be closed or not
Alert State Example
Shows any transformation or output from the Alert Key Template
Closed Alert Matching Text
For example on the right here we have a fleshed-out example. The example payload is as follows:
{
	"Computer": "Test01.cookdown.local",
	"Message": "Your Flux Capacitor has gone bad",
	"Key": "f20fa95bef054f3c838271fa9e6d9d1e",
	"status": "Resolved"
}
The example Alert State Liquid Template is this:
{% assign alertStatus = status | downcase %}{% if alertStatus == "resolved" or alertStatus == "closed" %}close{% else %}open{% endif %}
In this case, the key is already unique so we don’t need to do any transformations. We can just use it directly in the alert key template. If you don’t have an ID or something like that you could choose to use the computer and message to generate something unique enough.
The status is also pretty good for our example, we could choose to just use this directly. For our example, we’ve assumed that there is another closure state that could be sent, so resolved or closed. So we use a simple if statement to treat either case as a closure event. Most APIs are case-sensitive, so there shouldn’t really be any scenario where you have to account for the case, however, we have included a small example of how to account for this just in case.
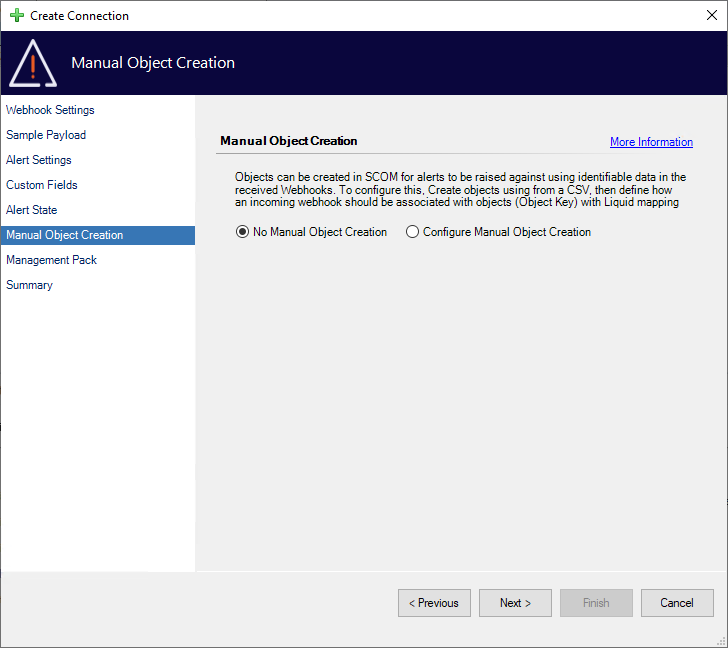
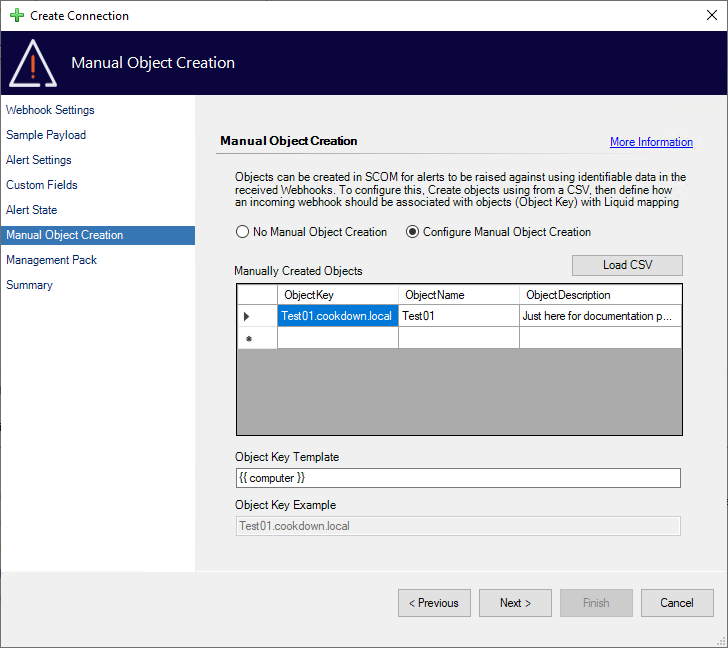
Manual Object Creation
Introduced in v. 4.0.0.0
Intended to offer a simpler alternative to a full SCOM discovery process, the Manual Object Creation page allows you to create simple objects against which you can raise alerts. If an object is not matched an alert will be raised against the webhook object ensuring that each scenario is covered.

Load CSV
Bulk load objects from a CSV file
Requires the CSV to have each of the expected columns (example file below)
Supports localization using an Excel CSV localization string (example file below)
Can include other columns, however these will be ignored
Manually Created Objects
ObjectKey
An ID used to match against incoming payloads
Required
Must be Unique
ObjectName
The display name for the object
Optional
Takes ObjectKey value if not provided
ObjectDescription
A comment or description to help you keep track of what the object is for
Optional
Not really used, intended for you to put your own notes in.
Object Key Template
Dynamic Text using the 'Liquid Template Language’
Used to match the incoming payload against ObjectKeys
Object Key Example
Shows you the output of the payload vs the Object Key Template
Example CSVs
We have here two example Comma Separated Values (CSV) files. The first one uses the default CSV comma separation from a decimal point based locale.
The second still uses the default CSV comma separator but uses an Excel localization string to override any differences caused by say decimal comma based locales. You can also use this to take the opposite approach and use this string to tell Connection Center to use a semi-colon for example. If detected Connection Center reads this string, applies the setting, and then moves on to the rest of the file.
Letters outside of the English alphabet can cause issues here and so we do not support them.
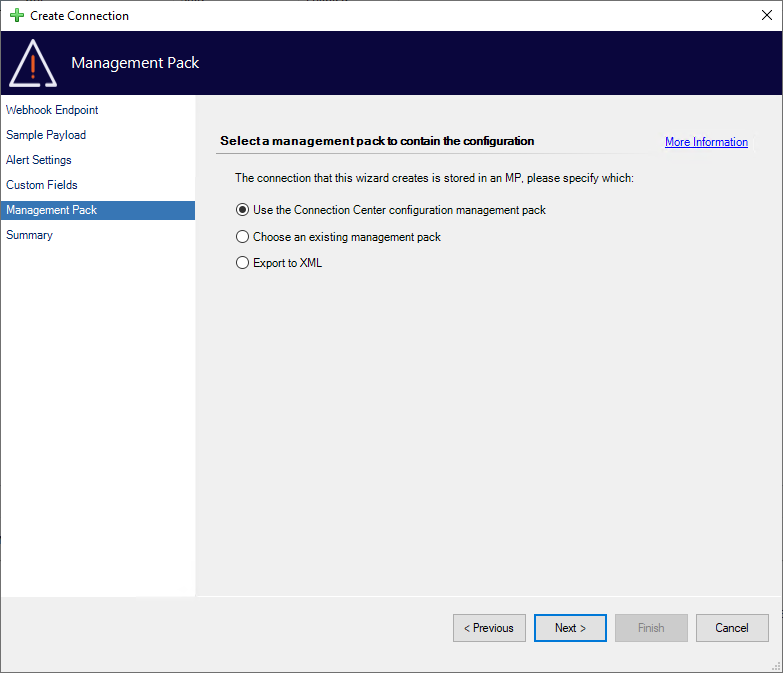
Management Pack
The Management Pack page allows you to select where your configuration will be stored.
By default, we store your configuration in a dedicated management pack. However, you are free to choose your own management pack (including creating a new one). You can also export the configuration to XML for use in change management processes or other reasons.
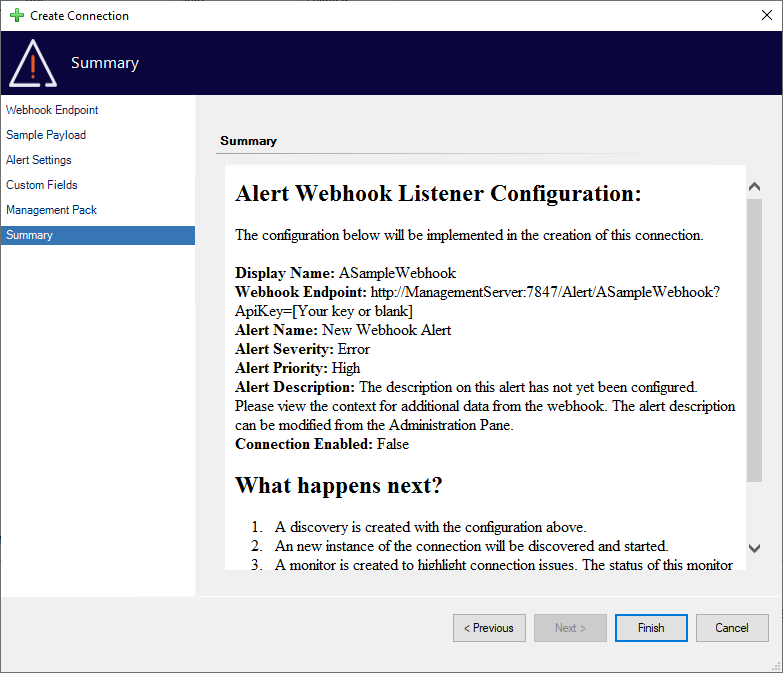
Summary
Finally, you will be brought to the summary screen where you can look over the configuration for a final time before finishing the wizard.
Should you wish to go back and change any part of your configuration, you can use the ‘Previous’ button or jump directly to the relevant page using the links on the left.
After You Finish and Further Reading
When you press the Finish button our wizard sets about putting your configuration in place. If the connection is enabled by default and not exported to XML the connection will set about publishing the webhook (which usually takes about 5 minutes). You can find further details about what to expect from this back on the main page here.
If you would like to learn more about templating please see the 'Liquid Template Language section.
If you would like to learn more about securing your Webhooks please see the Advanced Webhooks page.