SCOM Setup
After installing the Management Packs you will see some extra nodes appear in the SCOM Console’s Administration pane:
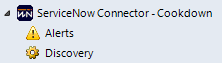
After this and creating the ServiceNow Service account you will be ready to continue with the set up process in SCOM.
This is comprised of:
Licensing Alert Sync
The first step to configuring Alert Sync in SCOM is to apply your license. If you do not have a license file, please contact hello@cookdown.com to get one.
When selecting ‘Alerts’ from the ‘ServiceNow Connector - Cookdown' node in the SCOM Administration pane you will be presented with a ‘Cookdown Licensing’ action in the 'Tasks’ pane to the right:
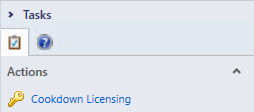
Selecting this action will start off the Licensing process.
Licensing online
In the SCOM Administration pane, select 'Alerts' from the ‘ServiceNow Connector - Cookdown' node
Select Cookdown Licensing from the Actions section of the Tasks pane on the right-hand side of the screen
Paste your license key into the provided ‘License Key’ text box
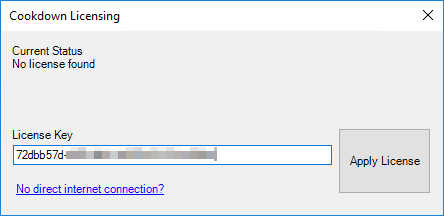
Press the ‘Apply License’ button
Accept the success message or take corrective action suggested

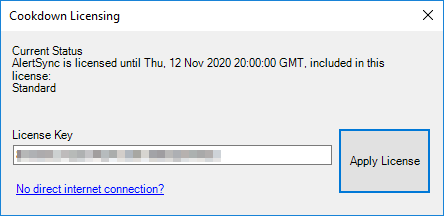
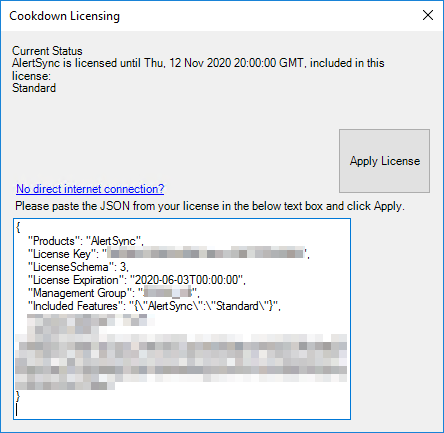
You will then be presented with the status of your license:
Licensing offline
In the SCOM Administration pane, select 'Alerts' from the ‘ServiceNow Connector - Cookdown' node
Select Cookdown Licensing from the Actions section of the Tasks pane on the right-hand side of the screen
Select the 'No direct internet connection?' link towards the bottom of the licensing window
Paste the contents of your license file into the provided text box (formatting does not matter)

Press the 'Apply License' button
Accept the success message or take corrective action suggested
You will then be presented with the status of your license:
Configure SCOM
Alert Sync uses standard SCOM Run As Accounts and Profiles. Whilst you will have to create a Run As Account for the service account created earlier, we provide you with a Run As Profile and Resource Pool out of the box.
Create Run As Account
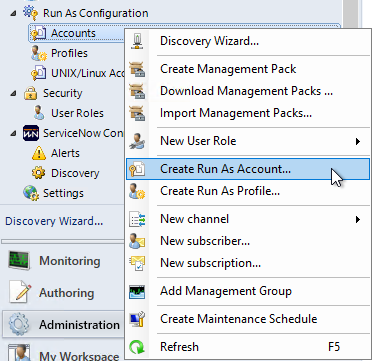
In the SCOM Console open the Administration pane then expand Run As Configuration
Right click ‘Accounts' and select 'Create Run As Account…’
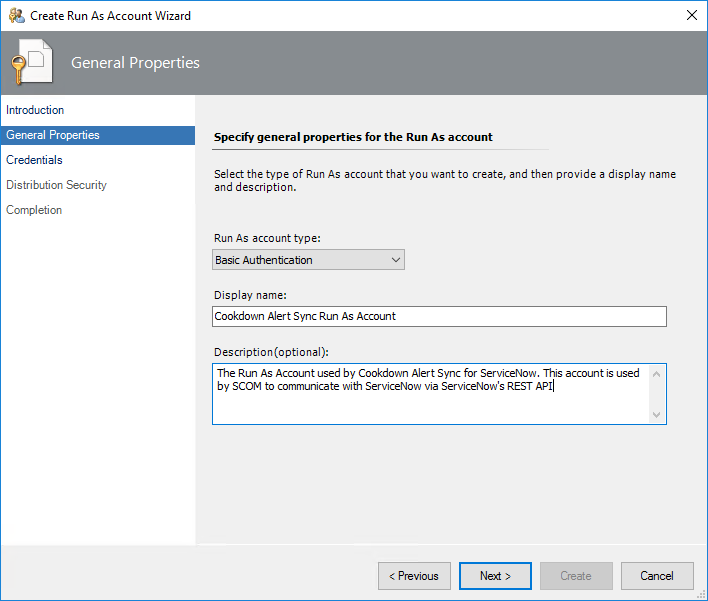
Under 'General Properties', set the type of Run as account to 'Basic Authentication', Give it an appropriate display name and description
Under 'Credentials' input your ServiceNow service accounts credentials
Under Distribution Security select your preferred distribution model. We recommend the 'More Secure' option and have written this guide assuming that this option is chosen
Click create
Distribute Run As Account
If you selected the 'More Secure' option in the previous section you will need to distribute the new Run As Account:
From the SCOM Administration Pane, expand ‘Run As Configuration', and select 'Accounts’
Find the Run As Account created in the previous section
Right click on this, select ‘Properties’, then select the 'Distribution' tab
From the ‘Selected Computers' section, press the 'Add’ button
Select your chosen distribution method (we recommend adding the 'Cookdown ServiceNow Connector Resource Pool') and then OK your way back out.
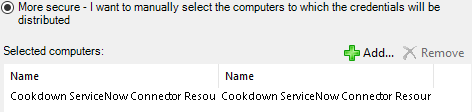
Whilst you can of course distribute this any way you see fit, we recommend using our Resource pool as this will automatically distribute these credentials to the relevant Management Servers.
Configure Run As Profile
From the SCOM Administration Pane, expand ‘Run As Configuration', and select 'Profiles’
Find the 'Cookdown: Alert Sync for ServiceNow' profile
Right click on this and select 'Properties'

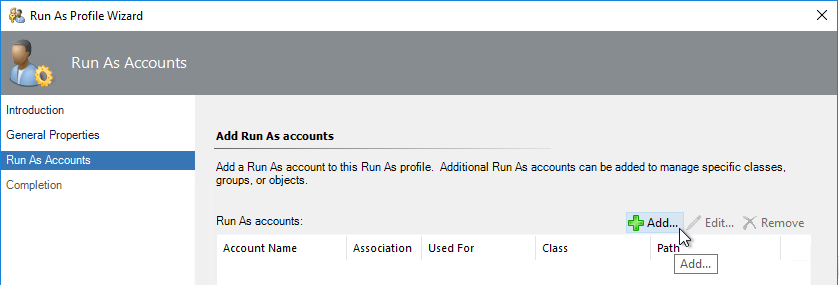
Skip through the wizard until you reach the ‘Run As Accounts' page and click the 'Add…’ button
Select the ‘Run As Account' created earlier
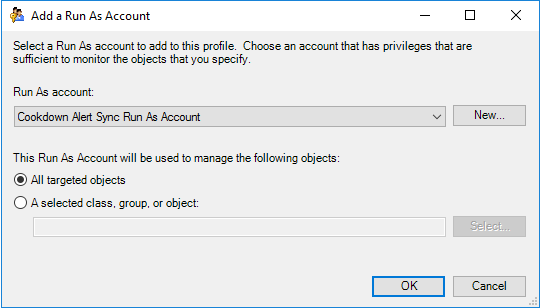
Ensure that ‘All targeted objects’ is selected before clicking 'OK'
Finally press 'Save'
Optionally: Modify the Resource pool Membership
By default the 'Cookdown ServiceNow Connector Resource Pool' is set to automatic membership and contains all of the Management Servers in your Management Group. This has a number of advantages including the same level of high availability that your Management Group is capable of providing as well as automatic configuration of any newly commissioned or decommissioned Management Servers. However should you need to manage this list manually you can do this as follows:
From the SCOM Administration Pane, select 'Resource Pools'
In the list find and select 'Cookdown ServiceNow Connector Resource Pool'
Right click on this, select ‘Manual Membership’, and select 'Yes’ at the warning message
Right click on this again, select 'Properties'
Next through the wizard until you reach the 'Pool Membership' page
Use the ‘Add’ or 'Remove' buttons to add or remove Management Servers respectively
Press ‘Next' until you are able to press 'Save’
Connector creation and configuration
You should now be ready to configure Alert Sync on SCOM.
Optionally: Configure proxy
If you are required to use or set up a proxy we would recommend that you attend to this before carrying on any further. This is an in depth topic in its own right with many options available, so has it’s own dedicated page.
Connector configuration
From the SCOM Administration Pane, expand the ‘ServiceNow Connector - Cookdown' node, and select 'Alerts’
Verify that your ‘Run As Account’ is configured correctly:
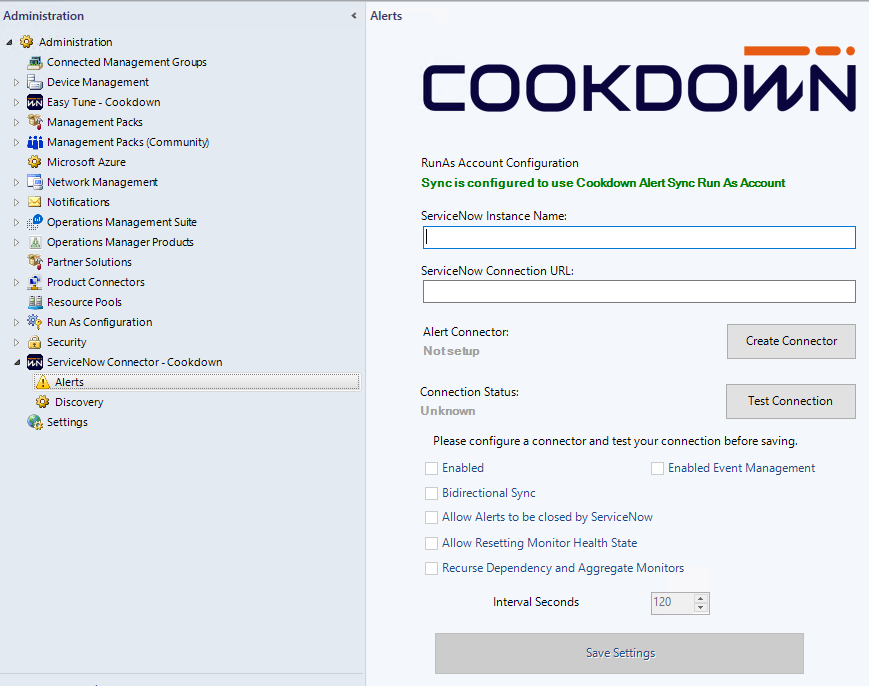
Fill in the ServiceNow Instance name
The URL field will auto-generate based on the Instance name. If this needs to be changed for any reason please replace the generated URL with the correct one
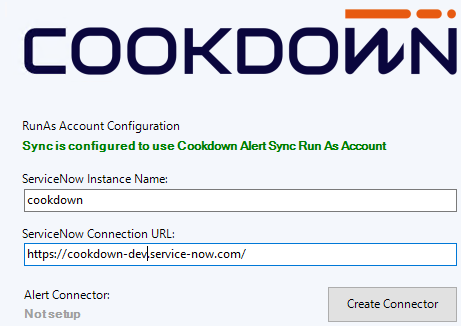
Click 'Create Connector'
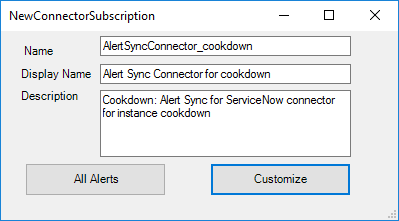
Enter your desired connector name, display name, and description
Select whether to send all alerts to ServiceNow or a custom set to be configured later
Select 'Test Connection' to verify basic connectivity to ServiceNow
When the test passes press the 'Save Settings' button
Settings are not saved automatically and will be lost if navigating away from the Alerts node without saving
Internal connector
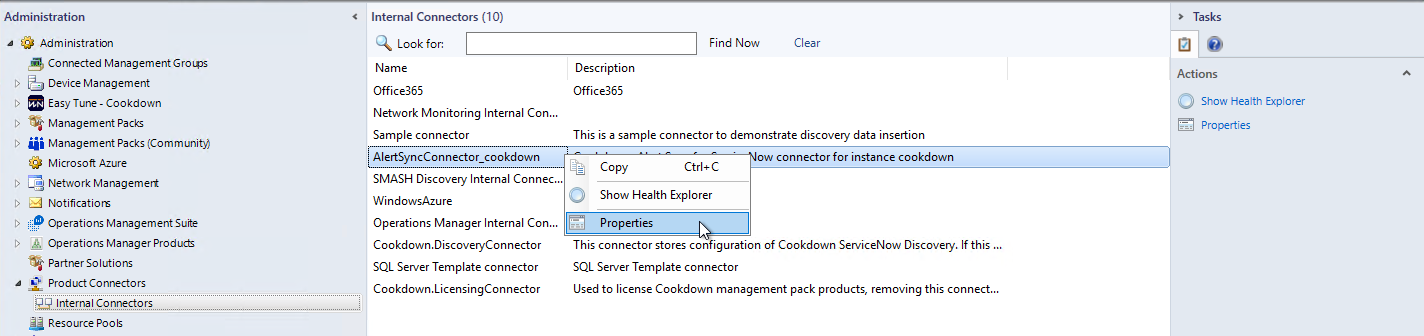
From the SCOM Administration Pane, expand the ‘Product Connectors' node, and select 'Internal Connectors’
Press F5 to refresh the connectors list before selecting the connector you created in the previous section
Right click on this connector and select 'Properties'
If you selected ‘All Alerts' in the previous section, check that a subscription is shown. If you picked ‘Customize’, press the 'Add…’ button to create a new subscription
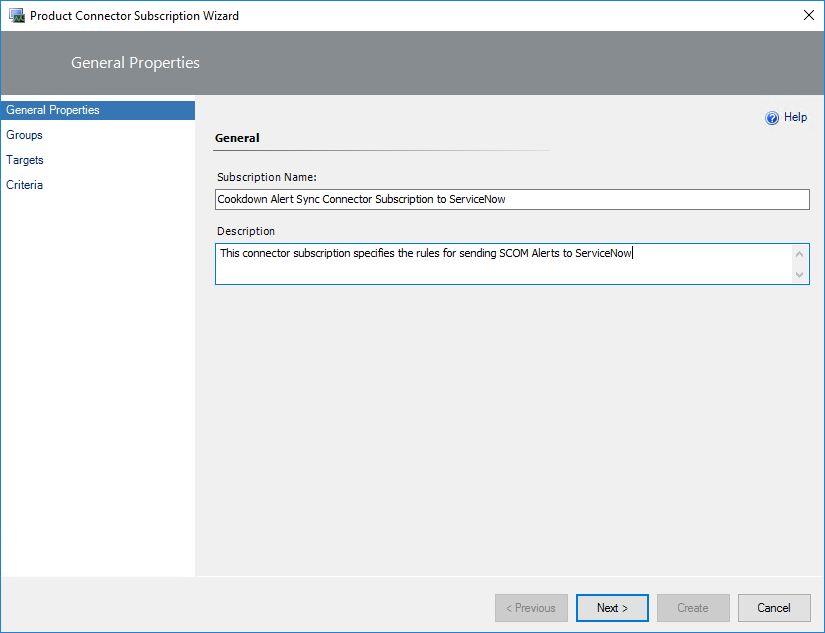
Give the subscription a name and description and press 'Next >'
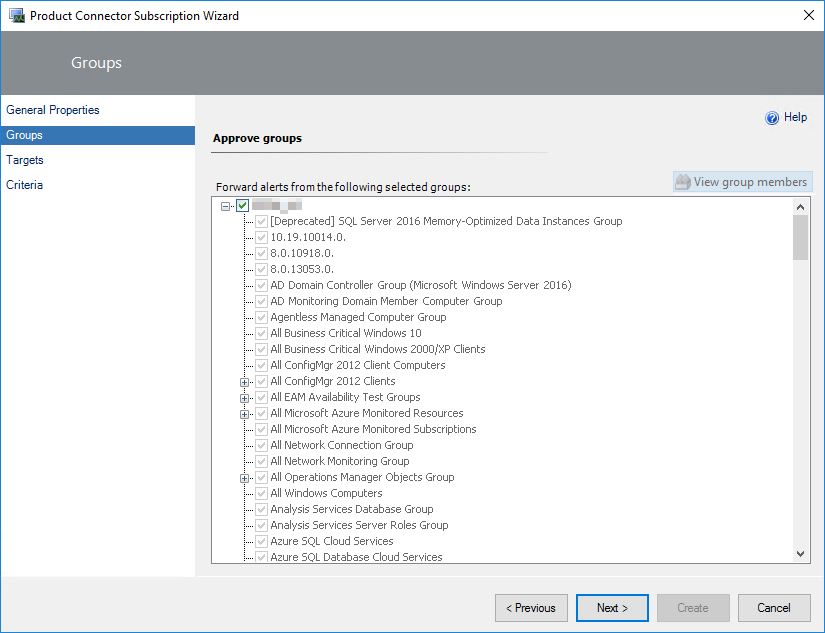
Select the groups that the subscription is approved for
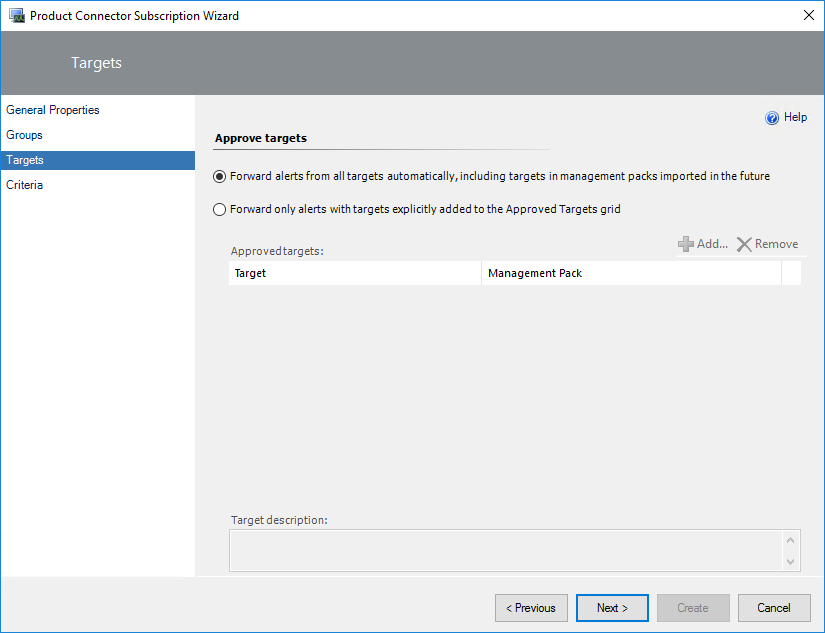
Select the desired alert forwarding behavior
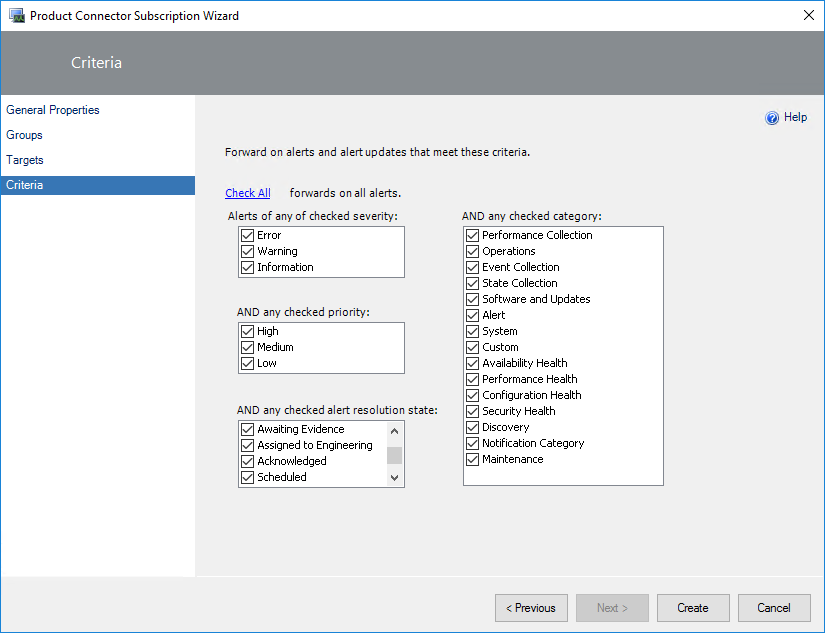
Set the criteria used by SCOM to select Alerts to forward and press 'Create'
Though there are use cases where having these options is useful, we recommend that you tune SCOM with Easy Tune. These settings are often too crude to effectively filter out Alerts at the connector level and can still lead to unactionable alerts.
As long as the connector is enabled you can still push alerts manually to ServiceNow whether or not there is a subscription present. This can be useful for troubleshooting or testing and is covered in a later stage in this article.
Global connector settings
After completing the previous stage there are a few final options that you can choose to customize your Alert Sync experience:
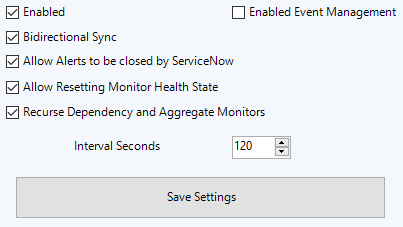
Enabled - When checked alerts are pushed to our ServiceNow app's "SCOM Alerts" table, when unchecked no Alerts are pushed/synced
We recommend completing set up before enabling Alert Sync
Enabled Event Management - When checked alerts are pushed to Event Management as Events
Not all ServiceNow instances will have Event Management available
SCOM alerts can be pushed to both our store app and event management at the same time if both enable settings are checked - this is useful for migrating to/from Event Management.
Bidirectional Sync - If checked ServiceNow data is synced to a SCOM Alert’s Custom Fields. If unchecked data from SCOM is synced to ServiceNow only
By default Bidirectional sync stores data in a SCOM Alert's CustomFields
Ensure that nothing is stored in the CustomFields before enabling or existing data will be overwritten
Allow Alerts to be closed by ServiceNow - If checked, when a ServiceNow Incident/Task is closed, the SCOM Alert that generated it is also closed
As ‘Bidirectional sync’ is a dependency for this setting it will be greyed out and inactive unless this is also enabled
Allow Resetting Monitor Health State - If checked, when an Incident/Task is closed from ServiceNow and the workflow that generated the alert is a Monitor one, Alert Sync will close the monitor alert and reset the monitor. If the monitor is still outside of its thresholds a new Alert and Incident/Task will be raised.
This setting has a dependency on both ‘Bidirectional Sync’ and ‘Allow Alerts to be closed by ServiceNow’ so will be greyed out and inactive unless these are also enabled
Recurse Dependency and Aggragate Monitors - Added in v 2.0.0.0 - If checked when an Incident/Task is closed from ServiceNow and the workflow that generated the alert is a Dependency or Aggregate Rollup monitor one, Alert Sync will recurse through all underlying unhealthy monitors and reset them. If the monitor is still outside of its thresholds a new Alert and Incident/Task will be raised
This setting has a dependency on ‘Bidirectional Sync', ‘Allow Alerts to be closed by ServiceNow' and 'Allow Resetting Monitor Health State’ so will be greyed out and inactive unless these are also enabled
As this setting operates recursively it can affect a large number of underlying monitors
Ensure that you understand the scope of any Dependency and Aggregate monitors you are raising Incidents/Tasks for before enabling this setting
Interval Seconds - The frequency at which SCOM Alerts are synced with ServiceNow
Default value = 120 secs
Minimum value = 60 secs
After completing both the SCOM and ServiceNow setup processes you should be ready to move on to initial testing.