Updating Alert Sync
This article discusses the process for updating/upgrading the Cookdown ServiceNow Connector. It contains general guidelines first and then calls out any additional steps that may be required when updating between versions.
SCOM
The System Center Operations Manager components are distributed in Management Pack Bundles allowing for a natural update path for SCOM administrators by importing the updated management pack.
General
All ServiceNow Connector updates are cumulative. So you can update from any older version to any newer version, skipping over versions if the opportunity exists. Any settings configured by previous versions will remain in place unless specifically noted below (some versions upgrades require configuration is re-implemented), so you may find that you need to enable new functionality brought in by the update.
Updating from 1.x and 2.0 versions to 2.1 and later versions
The 2.1 release brought in a number of new features and a new namespace to SCOM. This means that the upgrade process is a side-by-side installation rather than an in-place upgrade.
The Discovery product is currently only available from the original ServiceNow Connector. You will not be able to remove the prior versions of this management pack and continue to use this product.
If upgrading you can either create brand new connections or use your existing Internal Connector.
Creating brand new connections is typically the better option as the new subscription connection type will be the main development focus moving forward. However, migrating the Internal Connector may be a better short-term option if your SCOM side alert criteria are fairly complicated. You can always move to the new connection type at a later date.
Migrating your connection is a more complex task so we will be using that as the base for our upgrade guide. If you wish to create a new connection please see the 'Configure Outbound Notifications' page of the Connection Center knowledge-base guide.
Start by importing the latest management pack, this will provide you with access to the latest features. Next, you should link your Run-as account to the new Run-as profile.

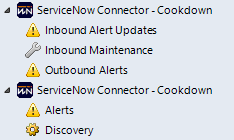
This is a brand new Run-as profile, so it is normal to see two ServiceNow profiles until the old management pack is removed.
From here you can also see our new Proxy Account, which can be linked to an account if your proxy requires authentication.
If you are upgrading to Connection Center (3.x +) you will also have to set the 'Advanced UI' registry key.
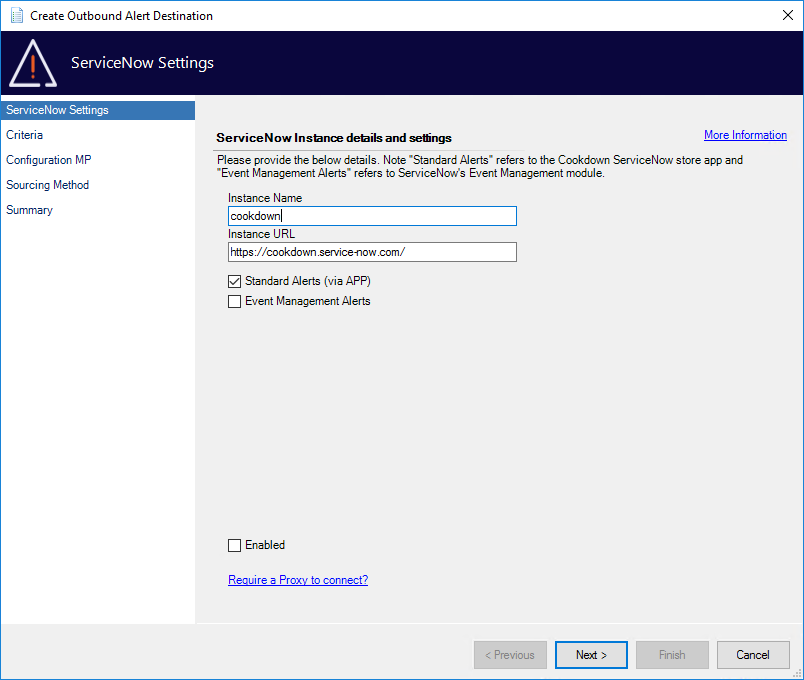
The next step is to set up a new Outbound Connection shell and link this back to your existing Internal Connector. Use the ‘Add New Connection' from the 'Outbound Alerts’ menu to start this process. Enter your ServiceNow Instance name, URL and set whether you are using App or Event Management sourced alerts. If you are using a proxy, click the link at the bottom of the page and fill in these details.
Make sure that you do not select the Enabled checkbox. We will enable this connection when we are ready later on in the process.
Select Next to move onto the criteria/scope selection. This is more granular than was previously available, however, you can modify this at any time so we recommend sticking with the defaults and using the criteria you already have set up with your existing connector (which we will insert later in the process) until you have finished your validation processes.
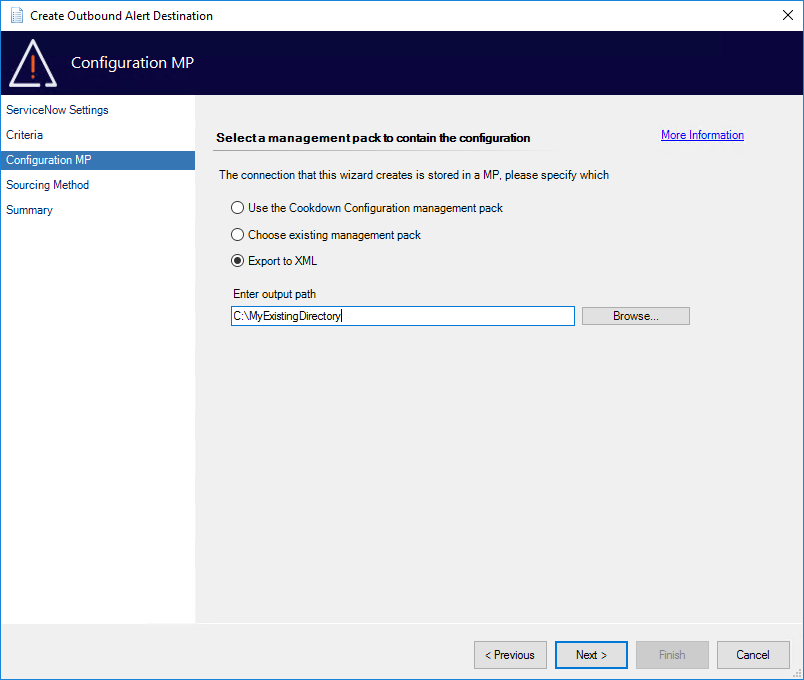
Select Next to continue on to select the management pack to store the new configuration in. At this stage, you should select 'Export to XML'. You will need to modify it to point at your existing Connector later in the process.
From the ‘Alert Sourcing Method' page select ‘Internal Connector’ and select Next. From the summary page ensure that the settings are as expected and press Finish.
You should now have an XML-based Management Pack in the directory you specified earlier.
Next, we need to find the Id of your previous connector. To do this open the ‘Operations Manager Shell' and use the 'Get-SCOMConnector’ cmdlet to identify your connector.
Get-SCOMConnector -Name AlertSync* | Select-Object -Property name,Id
If you have multiple connectors returned use the name to verify against the old UI which one you need to use. If you do not have any connectors returned, remove the name parameter to return all connectors and verify against the old UI which one you need to use.
Open the exported management pack in your favorite text editor. In this you need to find the ‘ConnectorId' node and replace the Guid with the one returned from the PowerShell command earlier. Save this MP and then import it to your management group. Give this time to process and then refresh the 'Outbound Alerts’ UI to check that this has imported successfully and has your new connection listed.
If you use Bi-directional sync use the new 'Inbound Notifications' menu to set up a new alert update connection as required. You can enable this immediately if you so wish.
From the old AlertSync UI deselect the ‘Enabled' and/or ‘Enabled Event Management’ as required. From the new 'Outbound Alerts’ UI enable your new connection.
We would recommend leaving the old Management Pack in place whilst you run any verification and validation processes your organization has. Should you need to roll back the changes this should then be as simple as disabling the new connections and re-enabling the older ones.
ServiceNow
The ServiceNow application components are distributed via Store Applications allowing for in-place upgrades for ServiceNow administrators by updating the Store Application from the 'System Applications' menu.
General
All ServiceNow Connector updates are cumulative. So you can update from any older version to any newer version, skipping over versions if the opportunity exists. Where customization has been put into the application, you may need to review the ‘Upgrade History’ and review any skipped changes.
Updating from 1.x versions to 2.x versions
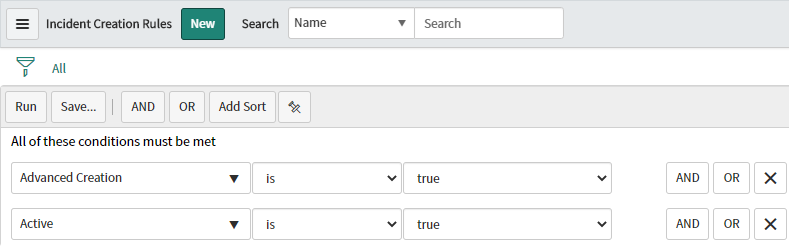
Starting in version 2.x Incident Creation Rules (ICR) have been replaced with Creation Rules (CR). As a part of this change ‘Advanced Creation' has been replaced with ‘Post Processing’. Post Processing differs in how it approaches creating new tasks which are incompatible with previous Advanced Creation Scripts. If you have not used Advanced Creation Scripts in your instance you can upgrade as normal. If you are unsure whether you have any active ICRs that use Advanced Creation or not you can use a filter to check for them:
In versions 1.x, Advanced Creation Scripts took over the process of creating new Incidents completely and so required you to populate all fields yourself regardless of what was set in the ICR and then raise the new Incident (or not). Version 2.x introduced Post Processing in which the task object is created with all of the settings specified in the CR (Assignment Group, Caller, Contact Type, etc.) to give you a starting block to work from.
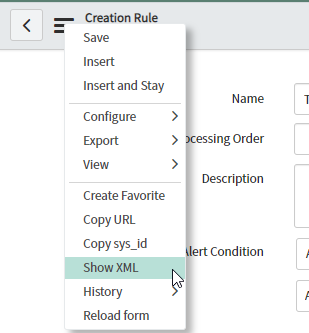
Though the Advanced Creation Scripts are no longer executed in 2.x the script is still retained on the old ICR record and can be accessed via the XML and referred back to if required:
Prior to your upgrade we would highly recommend looking at the Post Processing documentation. This will give you some of our example scripts ahead of time to compare against your current implementation. If you followed our previous examples most of the work will be changing ‘grInc’ to 'createdTask' and removing any settings that are now handled by the Creation Rules themselves. If you do have any queries around the changes in the new feature the Cookdown Support Team will be happy to assist!